

Embarking on the journey of installing a door yourself can be a rewarding and cost - effective home improvement project. As a door supplier, I've seen firsthand the satisfaction customers feel when they successfully install a door on their own. In this guide, I'll walk you through the step - by - step process of door installation, from preparation to the final touches.
1. Planning and Preparation
Before you start the actual installation, proper planning is crucial. First, measure the door opening accurately. Use a tape measure to get the height, width, and depth of the opening. Make sure to measure at multiple points as openings can sometimes be slightly out of square. The standard door sizes vary, but common interior door widths are 24, 28, 30, and 32 inches, while exterior doors are often 36 inches wide.
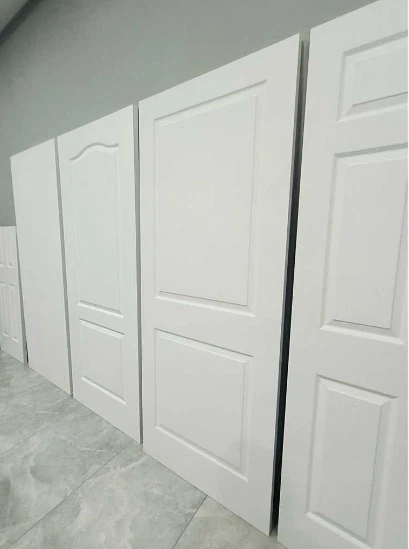
Next, choose the right door for your needs. We offer a wide range of doors, including the Stainable Fiberglass Front Door, which is durable and can enhance the curb appeal of your home. For interior spaces, the White Moulded Internal Doors are a popular choice due to their clean and classic look. And if you're looking for a door for your bathroom, the Waterproof Wpc Bathroom Doors are designed to withstand moisture.
Gather all the necessary tools. You'll need a drill, screwdriver set, hammer, level, chisel, and a pry bar. It's also a good idea to have safety equipment such as safety glasses and work gloves.
2. Removing the Old Door
If you're replacing an existing door, start by removing the old one. Open the door and locate the hinge pins. Use a hammer and a nail set to tap out the hinge pins from the top of the hinge. Once the pins are removed, carefully lift the door off the hinges and set it aside.
Next, remove the hinge screws from the door jamb using a screwdriver. You may need to use a pry bar to gently separate the jamb from the wall if it's stuck. Be careful not to damage the surrounding wall during this process.
3. Preparing the New Door
Before installing the new door, check it for any damage or defects. Make sure the door is the correct size and style. If the door is too wide or tall, you may need to trim it using a saw. However, it's best to do this in small increments and test the fit frequently.
If your new door comes with pre - hung hinges, make sure they are properly aligned. You can use a level to check the vertical and horizontal alignment of the hinges. If the hinges are not aligned correctly, the door may not open or close smoothly.
4. Installing the Door Jamb
Place the door jamb into the opening. Use shims to level the jamb both vertically and horizontally. A level is essential for this step to ensure that the door will hang straight. Start by placing shims at the top and bottom of the jamb, and then add more shims as needed to fill any gaps between the jamb and the wall.
Once the jamb is level, mark the screw holes on the wall through the holes in the jamb. Use a drill to create pilot holes in the wall. Then, insert screws through the jamb and into the wall to secure the jamb in place. Make sure to tighten the screws evenly to avoid warping the jamb.

5. Hanging the Door
Now it's time to hang the door on the jamb. Place the door against the jamb and align the hinge holes. Insert the hinge pins into the hinges and tap them in gently using a hammer and a nail set. Make sure the pins are fully inserted and that the door hangs freely.
Test the door by opening and closing it. If the door doesn't open or close smoothly, check the alignment of the hinges. You may need to adjust the shims or loosen and retighten the hinge screws to achieve the proper alignment.
6. Adding Hardware
After the door is hung, it's time to add the hardware. This includes the doorknob, lockset, and any other accessories such as a deadbolt or a door closer. Follow the manufacturer's instructions for installing the hardware.
Start by installing the doorknob. Most doorknobs come with a set of screws. Insert the screws through the holes in the door and tighten them using a screwdriver. Then, install the lockset in the same way. Make sure the lockset is properly aligned and that the key turns smoothly.
7. Finishing Touches
Once the hardware is installed, check the door one last time to make sure it operates smoothly. Fill any gaps between the jamb and the wall with caulk or wood filler. This will not only improve the appearance of the installation but also help to seal out drafts and moisture.
Sand any rough edges on the door or jamb and apply a finish such as paint or stain, depending on the type of door. This will protect the door and give it a finished look.
Conclusion
Installing a door yourself can be a challenging but achievable project. By following these steps and using the right tools and materials, you can successfully install a door in your home. As a door supplier, I'm here to support you throughout the process. If you have any questions or need further advice on choosing the right door or installation techniques, don't hesitate to contact us for a purchase negotiation. We're committed to providing you with high - quality doors and excellent customer service.
References
- "Home Improvement Handbook" by DIY Experts Publishing
- Manufacturer's installation guides for various door products