

Hey there! As a supplier of MDF acoustic panels, I often get asked if these panels are easy to replace. So, I thought I'd take some time to break it down for you.
First off, let's talk a bit about what MDF acoustic panels are. MDF stands for Medium Density Fiberboard. It's made by breaking down hardwood or softwood residuals into wood fibers. These fibers are then combined with wax and a resin binder, and formed under high temperature and pressure. The result is a dense, strong material that's ideal for acoustic applications.
Now, let's get to the main question: Are they easy to replace? The answer is... it depends. But in most cases, yes, MDF acoustic panels are relatively easy to replace.
Factors That Make Replacement Easy
1. Standard Sizes
Most MDF acoustic panels come in standard sizes. This means that finding a replacement panel that fits the existing frame or space is usually a breeze. Whether you're looking for a panel to replace a damaged one in your home studio or a large commercial space, standard sizing makes the process much simpler.
2. Installation Methods
These panels are typically installed using straightforward methods. For example, they can be glued, screwed, or nailed onto the wall or ceiling. If you need to replace a panel, reversing the installation process is often not too difficult.
If the panels were glued, you can use a heat gun to soften the adhesive and carefully remove the panel. With screwed or nailed panels, you just need a screwdriver or a hammer to take them off.
3. Availability
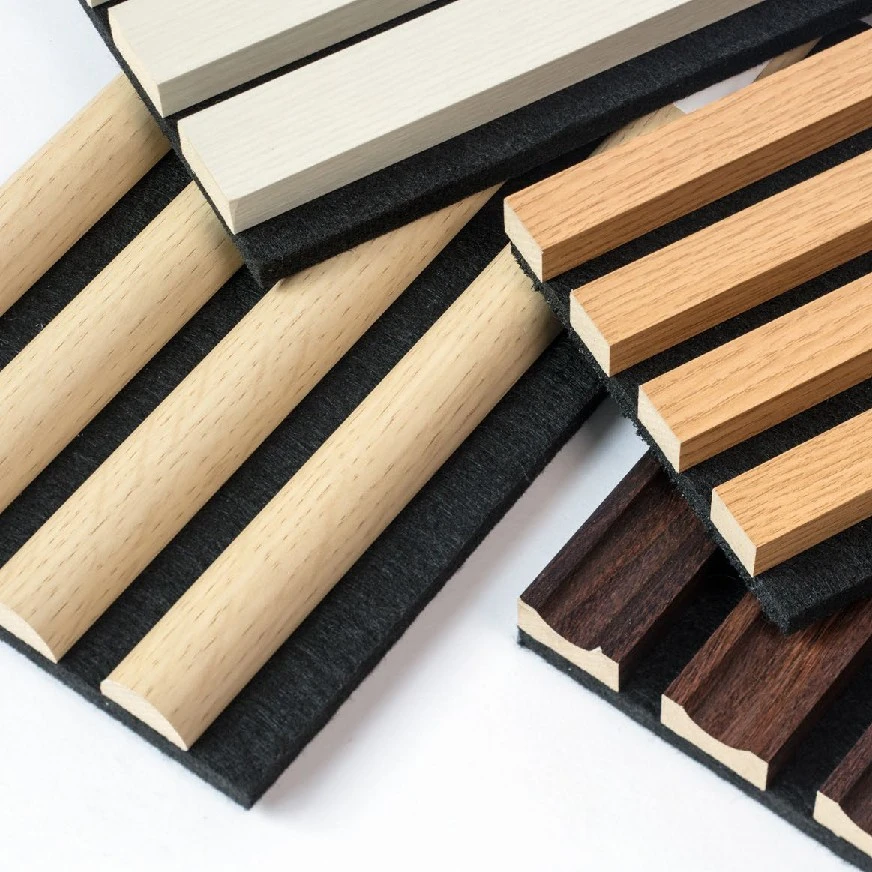
As a supplier, I can attest to the fact that MDF acoustic panels are widely available. You can find them in various colors, textures, and finishes to match your existing decor. For instance, we offer MDF Acoustic Panel with Wood Veneer and MDF Acoustic Panel with Technical Veneer. So, if you need a replacement, chances are you'll be able to find the exact panel you need.
Situations That Might Make Replacement Trickier
1. Custom Installations
If the MDF acoustic panels were custom - installed, replacement can be a bit more challenging. Custom sizes, shapes, or unique installation methods may require more effort and expertise. For example, if the panels were cut to fit a curved wall or a non - standard room layout, getting an exact replacement can be difficult.

2. Adhesive Issues
Sometimes, the adhesive used during installation can cause problems. If it was a very strong adhesive or if it has been a long time since the panel was installed, it might be hard to remove the panel without damaging the surrounding area. In such cases, you may need to use specialized tools or consult a professional.
3. Matching the Finish
Over time, the color or finish of the existing panels may fade or change slightly due to exposure to light, moisture, or other environmental factors. Finding a replacement panel that perfectly matches the existing ones can be a challenge, especially if the original panels were from an older batch.
Step - by - Step Guide to Replacing MDF Acoustic Panels
Step 1: Assess the Damage
Before you start replacing a panel, take a good look at the damage. Is it a small scratch, a large crack, or a complete breakdown of the panel? This will help you determine if a replacement is necessary and what type of panel you'll need.
Step 2: Prepare the Tools
Gather the necessary tools such as a screwdriver, hammer, heat gun (if the panel is glued), measuring tape, and a new panel. Make sure the new panel matches the size and finish of the existing one as closely as possible.
Step 3: Remove the Old Panel
If the panel is screwed or nailed, simply remove the fasteners. If it's glued, use the heat gun to heat the edges of the panel until the adhesive softens. Then, gently pry the panel off using a putty knife or a similar tool.
Step 4: Clean the Surface
Once the old panel is removed, clean the surface where the new panel will be installed. Remove any remaining adhesive or debris to ensure a smooth and secure fit.
Step 5: Install the New Panel
Position the new panel in place and attach it using the same method as the old one. If it's a glued panel, apply the adhesive evenly on the back of the panel and press it firmly against the wall. If it's screwed or nailed, use the appropriate fasteners to secure it.
Why Choose MDF Acoustic Panels for Your Space
1. Acoustic Performance
MDF acoustic panels are great at reducing echo and noise in a room. They absorb sound waves, which helps to create a more comfortable and quiet environment. Whether you're in a home theater, a recording studio, or a noisy office, these panels can make a significant difference.
2. Aesthetic Appeal
With a wide range of finishes and colors available, MDF acoustic panels can enhance the look of any space. You can choose from natural wood veneers for a warm and rustic look or technical veneers for a more modern and sleek appearance.
3. Cost - Effectiveness
Compared to some other acoustic materials, MDF acoustic panels are relatively affordable. They offer a good balance between cost and performance, making them a popular choice for both residential and commercial applications.
Conclusion
So, to sum it up, MDF acoustic panels are generally easy to replace, especially if they are standard - sized and installed using common methods. However, custom installations and adhesive issues can make the process a bit more complicated.
If you're thinking about using MDF acoustic panels in your space or need to replace some existing ones, don't hesitate to reach out. We're here to help you find the right panels and provide any support you need during the installation or replacement process. Whether it's for a small home project or a large commercial venture, we've got you covered.
References
- Wood Products Council. (2023). Medium Density Fiberboard: A Versatile Building Material.
- Acoustical Society of America. (2022). Best Practices for Acoustic Panel Installation and Replacement.